Share Link:

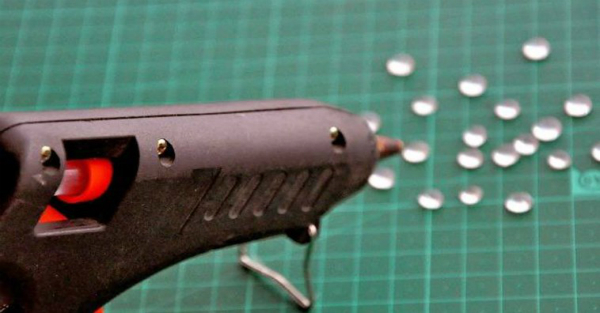
A regular hot glue gun can be used not only for gluing various parts, but also for creating various patterns and crafts.
When working with hot glue, be careful and pay special attention to the safety of children, as the glue gun gets hot and the glue comes out very hot.
Here are some very interesting and unusual ideas on how else you can use a glue gun and hot glue:
Glue crafts. Using wax crayons
You will need:
- glue gun
- wax crayons
- cardboard.
* It is possible that after using wax crayons, your glue gun will deteriorate, so it is advisable to use an old or inexpensive gun.
* If children are working on the project, then carefully monitor the work with a hot glue gun and hot melted crayons.
1. Remove the labels (papers) from the crayons.
2. Cover the workplace with an old towel.
3. Heat up the glue gun.
4. Gently insert the crayon into the glue gun and gradually push it through. The glue gun's trigger won't be able to push them through, so you'll have to do it by hand.
5. The wax will start to melt and you can use the colored drops of wax to create vibrant blobs.
Decorate a vase or candlestick with hot glue.
You will need:
- inexpensive, round vase or candlestick
- glue gun with hot glue.
Heat up the glue and start gently applying it to the vase, layer by layer, until you end up with transparent lines on the walls of the vase.
If you want to make smoother lines, ask someone to help you - have the vase spin while you apply the glue.
Hot glue corals.
You will need:
- thin wire
- glue gun with hot glue
– acrylic paint
- brush
- piece of plywood
- nails and a hammer.
Making red coral
1. Cut the wire into several pieces of different lengths. In this example, their length varies from 10 to 40 cm. Bend each piece in half.
2. Heat the glue and gently cover all the pieces of wire with it.
3. Choose the color you want to paint the coral, in this case red. Use acrylic paint to paint the glue on the wires.
4. When the paint is dry, you can collect all the details into one coral. Take 2-3 pieces of wire with glue and connect them together with another thin clean wire (not covered with glue).
Add 2 more parts to the structure and connect them again with clean wire.
In order for the coral to stand on a flat surface, all ends of the clean wires must be twisted and bent into a stand shape (see image).
Making white coral
1. Cut 3 pieces of wire, each between 30 and 35 cm long and twist their ends together
2. Bend all the wires to your liking and lay them on a flat surface where hot glue won't stick - glass, for example.
3. Cover all wires with glue. After that, you can add additional branches of glue to your design.
4. Once you've made the coral the shape you want, let the glue dry and paint it with white acrylic paint.
5. To make the base for the craft, prepare a piece of plywood and attach the ends of the wires to it with nails.
6. Cover the ends with glue and paint with acrylic paint.
Hot glue snowflakes.
You will need:
- glue gun with hot glue
- nail polish or acrylic paint
- parchment paper (NOT waxed (wax) paper)
- the drawn shape of a snowflake (if desired).
1. Print or draw a snowflake on a plain paper and place the drawing under parchment paper.
2. Using a glue gun and hot glue, trace around the snowflake pattern. Wait a minute for the glue to dry.
If necessary, after the glue has dried, you can slightly trim the shape with a hair dryer.
3. Carefully remove the snowflake from the paper. The paper can be used further to create more snowflakes.
4. Both sides of the glue snowflake can be painted with nail polish or acrylic paint.
Candle glass holder.
You will need:
- a small glass vase or glass
- glue gun with hot glue
- spray or acrylic paint
- spray oil or plain vegetable oil.
It is advisable to choose a wide vase so that the heat from the candle inside it does not heat up the glue, which can leak.
1. Wash and dry the vase, then wipe it with vegetable oil and a paper towel.
2. Start applying hot glue to the back of the bottom of the vase, drawing patterns with it. The main thing is that all the lines are well intertwined so that it is easier to remove the glue from the vase.
Continue to paint patterns with glue on the sides of the vase.
It is advisable to wear goggles to protect your eyes, as the glue will heat up the glass.
3. When the glue is dry, gently begin to separate the pattern from the vase. You may need to use a screwdriver, knife, or other tool to make it easier to separate the pattern from the glass vase.
4. Clean the vase of glue residue. Use dishwashing liquid.
5. Paint the drawing with glue. If you are using spray paint, read the instructions carefully and follow them.
Crafts for children: do-it-yourself printing
* First, cover the table surface with a special silicone board or silicone oilcloth.
Crafts for the home: making a vase from glue
Makeup brush cleaning board:
For some more interesting ideas, see the video:
Source
